Last updated on May 28, 2026
Rubrics provide a set of criteria used to evaluate student performance. In Canvas, rubrics help give students clear expectations and guidance for assignments. Canvas Enhanced Rubrics (2026) also include multiple viewing options: Traditional, Horizontal, and Vertical, which allow instructors to choose the grading layout that best fits their workflow. When integrated with SpeedGrader, rubrics enable quick, consistent, and efficient feedback and assessment for students.
Note: These instructions assume that a rubric has already been created and attached to the assignment. Please refer to the Create a Rubric in Canvas and Attach a Rubric to an Assignment tutorials for information on how to complete those steps.
Directions
- Log in to your Canvas Account.
- Select the Course you’d like to work in.
- Click Grades on the course menu to the left.
- Hover your cursor over the Name of the assignment you’d like to grade.
- Click the More Options Menu (three vertical dots) to the right of the assignment name.
- Click SpeedGrader.
- The assignment will appear on the left, and the grading and feedback panel on the right.
- Click and drag the Vertical Bar of the Grading and Feedback Panel to adjust the width of the panel.
- Review the Student’s Work.
- Click on the drop-down box labeled View Mode.
- The Traditional Rubric View displays the rubric in a familiar grid format with criteria listed in rows and performance levels listed in columns. Instructors can quickly assess student work by selecting the appropriate rating for each criterion. Point values and comments can be entered directly within the rubric during grading.
- The Horizontal Rubric View organizes rubric criteria in a side-by-side layout that emphasizes readability and easier navigation across performance levels. This view can make longer rubric descriptions easier to read and reduce scrolling when evaluating student submissions.
- The Vertical Rubric View stacks performance levels beneath each criterion, allowing instructors to focus on one criterion at a time. This format can improve accessibility and readability, especially when using detailed feedback and comments.
- Click on the Appropriate Rating Box for a criterion to evaluate that student.
- Optionally Type any criteria specific feedback in the comment box below the criterion.
- Note: In Traditional View, you can provide criterion-specific feedback by clicking on the Comment Icon within the pts box.
- Repeat for every criterion.
- Note: Total points will auto-calculate. You can override this by typing a different value in the Points box under the criterion.
- Click the Submit Assessment button under the rubric.
- Note: If the total points in the Assessment box does not auto-populate after submitting the assessment, check that your rubric settings are set to be used for grading.
- Click the Assignment Name.
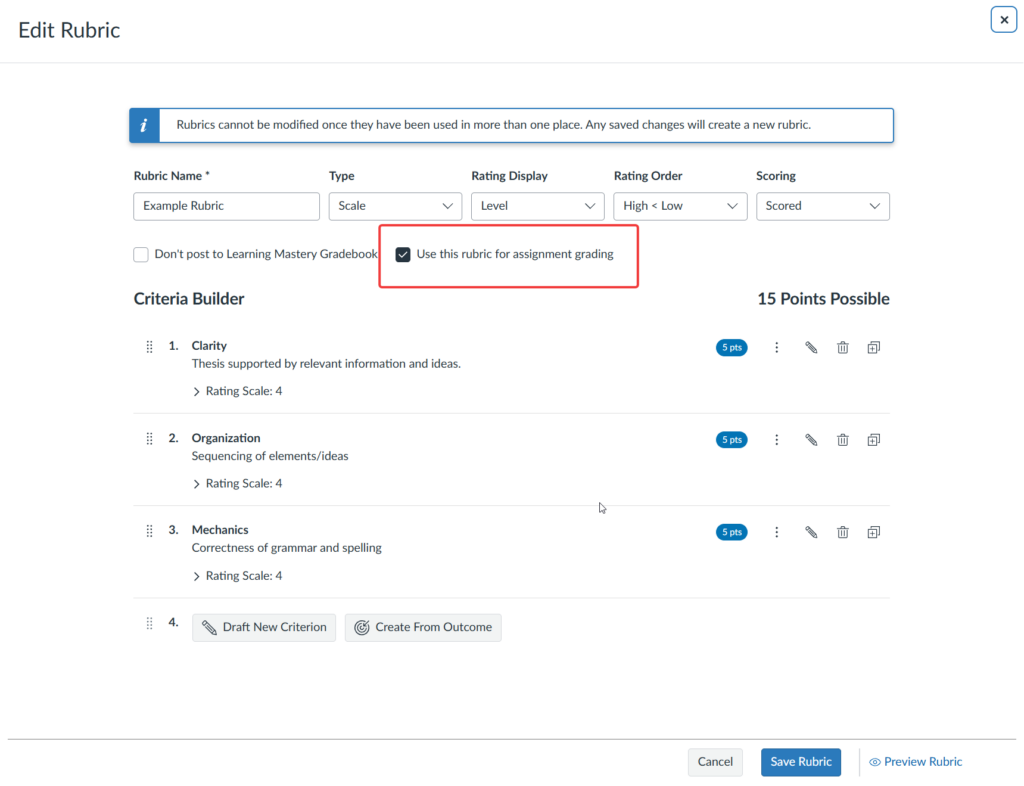
- Click the pencil icon next to the rubric title.
- Check the box next to Use this rubric for assignment grading.
- Click Save Rubric.
- Note: If the total points in the Assessment box does not auto-populate after submitting the assessment, check that your rubric settings are set to be used for grading.
- Resubmit the Rubric Assessment in SpeedGrader for the grade to auto-populate.
- Optionally, type any desired feedback in the Assignment Comments Box.
- Click the Submit Comment Button.
Have Questions?
Need additional support on this or other teaching and learning topics? Please visit us for drop-in support (10am-3pm, M-F) or try one of our self-help tutorials.
Ready to take your teaching to the next level? Opt into our Connections with CTLD newsletter!