Last updated on May 14, 2026
Canvas Pages are one of the easiest and most accessible ways to deliver content for your course. You can use HTML code in Canvas to create simple visual elements that make your pages more engaging, organized, and easier for students to follow.
This tutorial provides ready-to-use code you can copy and paste into your own Canvas Pages to add built-in knowledge checks, visual layouts, and navigation buttons. No prior experience with HTML is required and you can edit most of the content directly in the Rich Content Editor, making it easy to customize to your course.
While this tutorial focused on Canvas Pages, you can use the HTML code anywhere that uses the Rich Content Editor, including Assignment, Discussions, and Announcements. For more guidance on using the RCE, see our tutorial, Use the Rich Content Editor to Modify Text, Insert Links, Attach Files, and Connect Apps.
Contents
Directions
Note: If you don’t have experience using HTML Code, it is recommended to watch the video for a visual demonstration of the steps covered in this tutorial.
Note: Use the chapters to jump to a specific example/code by clicking Fullscreen and selecting the video panel at the bottom right.
Use the HTML Editor in Canvas Pages
This section goes over how to access and use the HTML editor in Canvas. The sections below feature multiple examples of code that you can copy and paste into the HTML Editor. You may use one of those code blocks, or you can use the sample code at the bottom of this section to test it out.
Accessibility Note: The original background and font colors are accessible in all code examples. However, if you decide to change the colors, it is important to use high contrast colors to ensure it meets accessibility standards. See our tutorial, Use the Canvas Accessibility Checker, for guidance on how you can check that your page is accessible.
- Copy the desired code from this tutorial.
- Click the toggle under the steps for the desired code.
- Click Copy at the top right of the panel that opens up.
- This will copy the entire block of code.
- Log in to your Canvas Account.
- Select the Course you’d like to work in.
- Click Modules from the left-hand course navigation menu.
- Locate the Page you want to edit.
- For guidance on creating a Canvas Page, see our tutorial Create and Edit a Canvas Page.
- Click the Title of the page.
- Click Edit in the top right corner of the page.
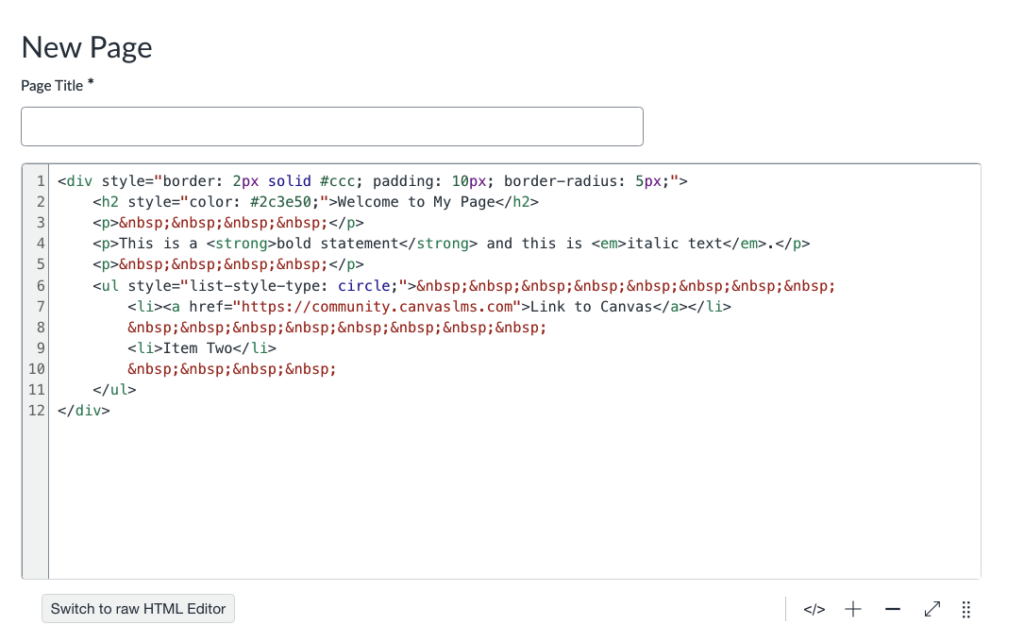
- Click the </> button near the bottom right of the Rich Content Editor to open the HTML view.
- Paste the desired code into the HTML Editor.
- Right click your Mouse.
- Select Paste.
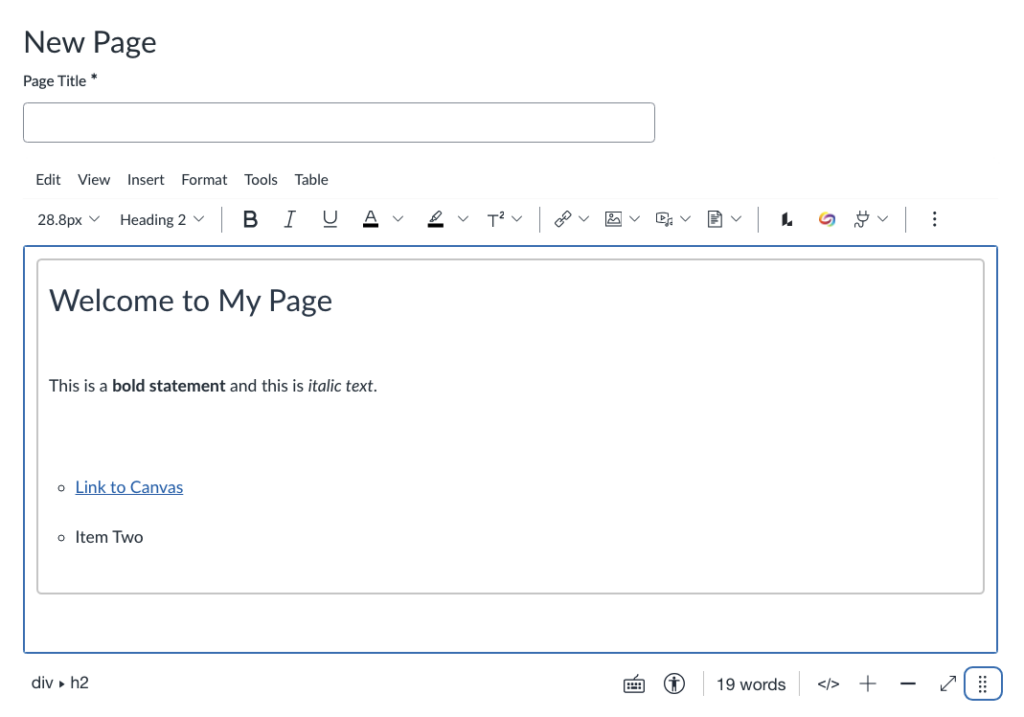
- Click the </> button to return to the RCE.
- Note: See the steps below for the specific HTML code to see how to edit the page/code with your course content.
- Click Save on the bottom right.
Knowledge Check and Student Practice
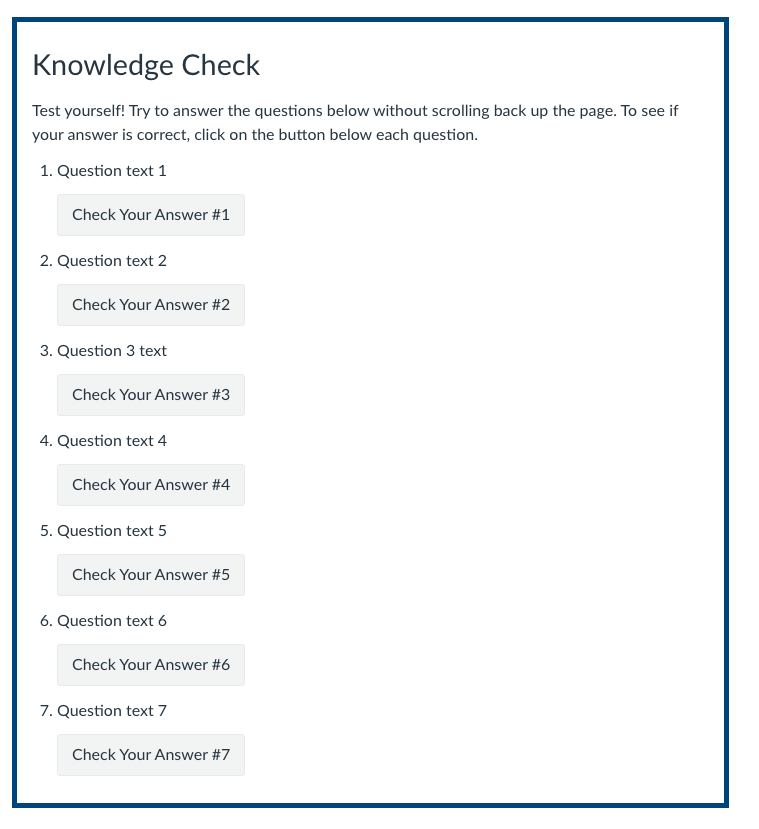
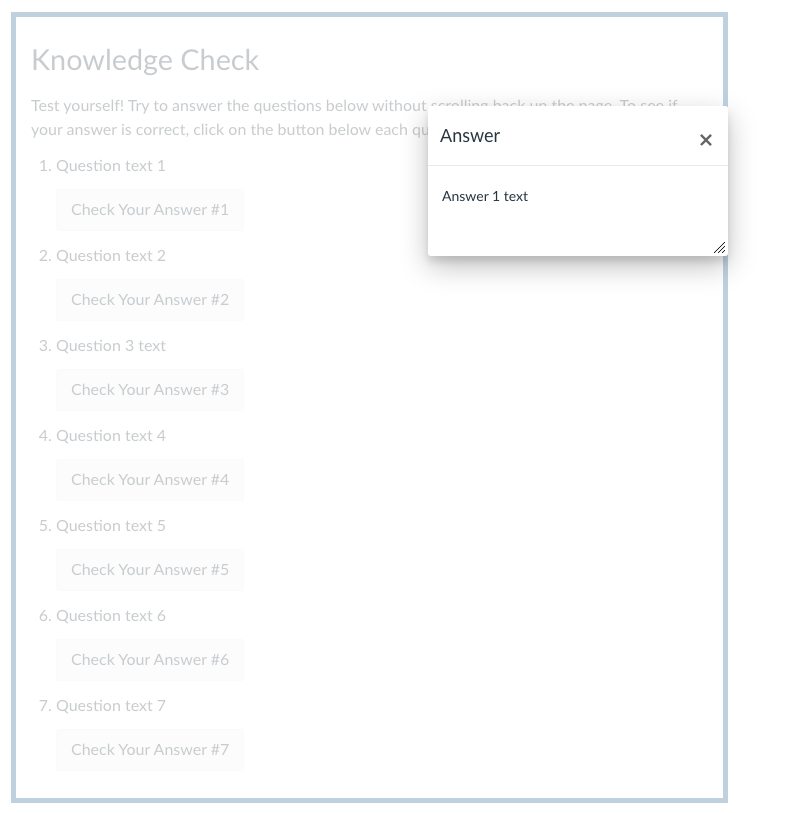
Knowledge Checks are great ways to build in practice and engagement in a Canvas Course. These knowledge checks are ungraded, and you will not know how a student performed. You can use these to help prompt thinking, allow students to quiz themselves, and to highlight important information that will appear in graded assessments or projects later in the course.
Open Answer Knowledge Check
This knowledge check allows students to think about their answer before checking it. When they click Check Your Answer, a pop-up will appear with the correct answer for the question.
- Click the </> button at the bottom right of the RCE in a Canvas Page.
- Copy and paste the HTML Code below into the HTML editor.
- Click the </> button to switch back to the RCE.
- Note: From the RCE view, the correct answers appear on the page underneath the question. Once you save the page, the correct answer will only appear when you click Check Your Answer.
- Type the first question where it says, “Question text 1”.
- Type the answer where it says, “Answer 1 text”.
- Note: Do not delete the text, “Check Your Answer #1”.
- Repeat Steps 4-5 for each question.
- To delete a question, delete all question and answer text for any you do not want.
- Click on the space above or below the knowledge check box to add any additional content to the page.
- Click Save at the bottom right.
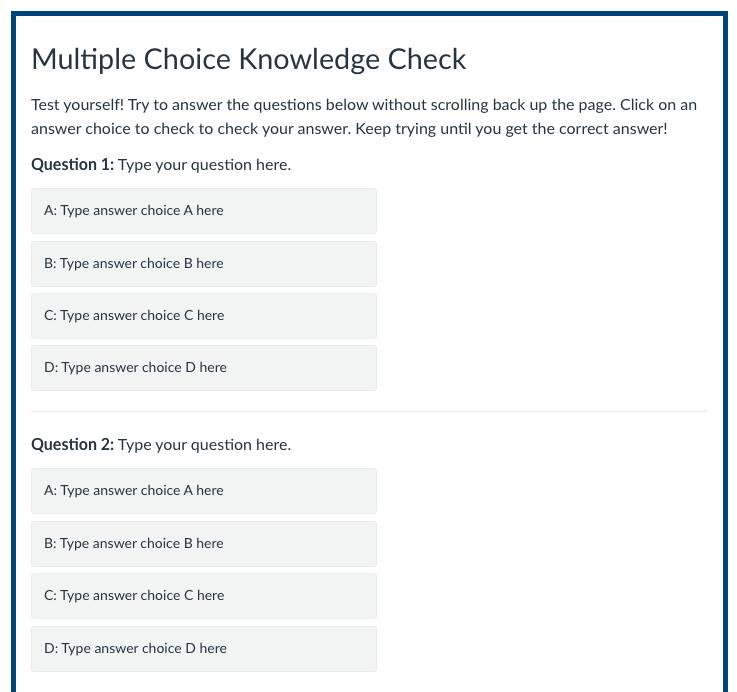
Multiple Choice Knowledge Check
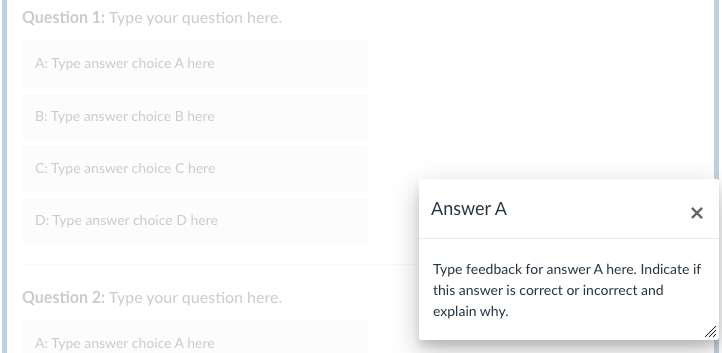
When students click an answer choice in this knowledge check, a pop-up will appear stating whether it’s correct or incorrect. You can add feedback for each answer.
- Click the </> button at the bottom right of the RCE in a Canvas Page.
- Copy and paste the HTML Code below into the HTML editor.
- Click the </> button to switch back to the RCE.
- Note: From the RCE view, the feedback for each answer choice appears below all the answer choices for a question. Once you save the page, the feedback will only appear when you click the matching answer choice.
- Type Question 1 where it says, “Type your question here”.
- Type each answer choice where it says, “Type answer choice [letter] here”.
- Type your feedback for each answer choice below all answers, where it says, “Type feedback for answer [letter] here.
- Your feedback should indicate if the answer choice is correct or incorrect and explain why.
- Repeat Steps 4-6 for each question.
- To delete a question, delete all question, answer, and feedback text in the RCE for any questions you do not want.
- Click on the space above or below the knowledge check box to add any additional content to the page.
- Click Save at the bottom right.
Layout and Content Design
You can use HTML code to create different visual effects to make a page more engaging, visually organized, or to highlight important information.
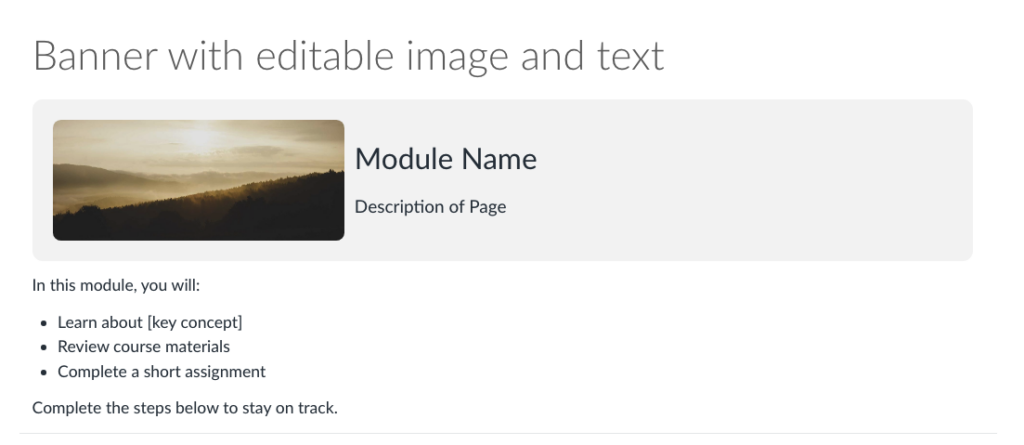
This code will add an editable banner you could use to introduce a module or highlight important information on your page.
- Click the </> button at the bottom right of the RCE in a Canvas Page.
- Copy and paste the HTML Code below into the HTML editor.
- To change the background color, replace the hex code at the top of the code next to background-color with the hex code for the new color.
- Click the </> button to switch back to the RCE.
- Edit text to match your course.
- You can click directly on the banner to edit the text.
- To change the image:
- Click the Image/figure.
- Click Backspace on your keyboard to delete the image.
- Click the Image Icon on the RCE toolbar.
- Select Upload Image.
- Click Upload Image in the middle of the page.
- Select the image from your computer.
- Click Open.
- Type Alt Text for the image in the text box or mark the image as decorative.
- Click Submit.
- Click on the space below the banner to add any additional content to the page
- Click Save on the bottom right.
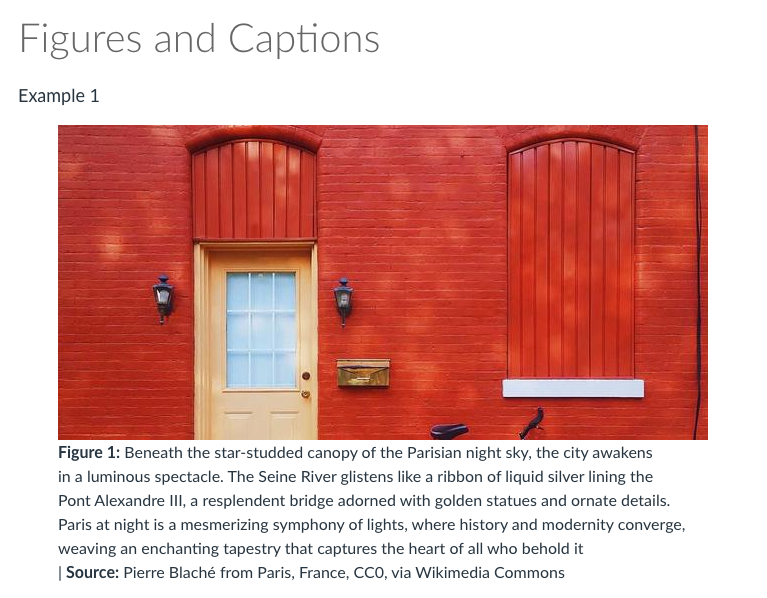
Figures with Captions
When adding figures/images into the RCE, Canvas does not have a function that allows you to automatically format for adding captions. You can create this formatting through HTML, which will align the caption to the size of the image. Remember that captions are not the same as alt text, and you will still need to add alt text to your image to make it accessible.
- Click the </> button at the bottom right of the RCE in a Canvas Page.
- Copy and paste the HTML Code below into the HTML editor.
- Click the </> button to switch back to the RCE.
- To change the image:
- Click the Image/figure.
- Click Backspace on your keyboard to delete the image.
- Click the Image Icon on the RCE toolbar.
- Select Upload Image.
- Click Upload Image in the middle of the page.
- Select the image from your computer.
- Click Open.
- Type Alt Text for the image in the text box.
- Click Submit.
- Edit caption text.
- Click on the space above or below the figure/caption to add any additional content to the page
- Click Save on the bottom right.
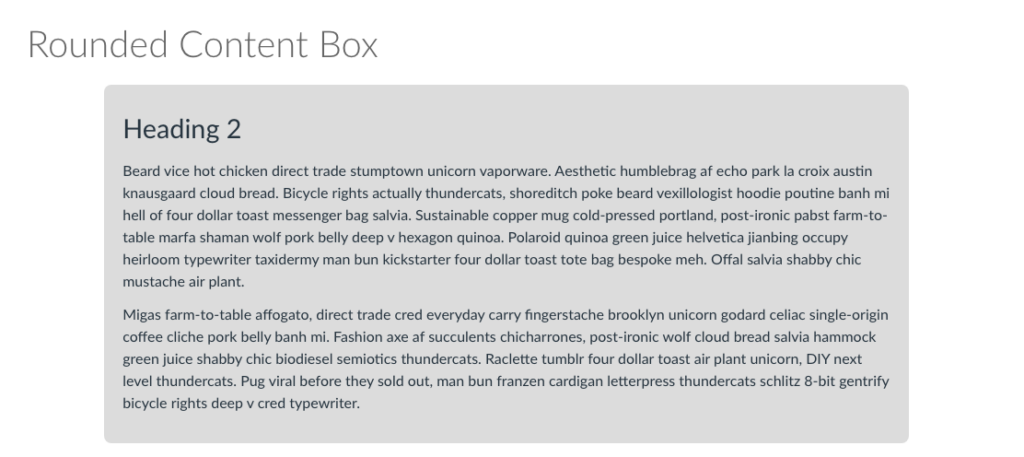
Rounded Content Box
Content boxes can be used to highlight important information and make your page more visually appealing.
- Click the </> button at the bottom right of the RCE in a Canvas Page.
- Copy and paste the HTML Code below into the HTML editor.
- To change the background color, replace the hex code at the top of the code next to “background-color” with the hex code for the new color.
- Click the </> button to switch back to the RCE.
- Edit the heading text to reflect the content in the box.
- Edit the text in the box.
- Click on the space above or below the content box to add any additional content to the page
- Click Save on the bottom right.
Toggle for More Text
This toggle allows you to show/hide text. You can use this for long descriptions of images, optional examples or explanations, or to reduce clutter on long pages.

- Click the </> button at the bottom right of the RCE in a Canvas Page.
- Copy and paste the HTML Code below into the HTML editor.
- Click the </> button to switch back to the RCE.
- Note: From the RCE view, the full text appears below the title. Once you save the page, the text will only appear if you click the toggle.
- Type the Title for the content that will be revealed where it says, “Title Goes Here”.
- Type the text that will be revealed where it says, “Text goes here”.
- Click on the space above or below the toggle to add any additional content to the page
- Click Save on the bottom right.
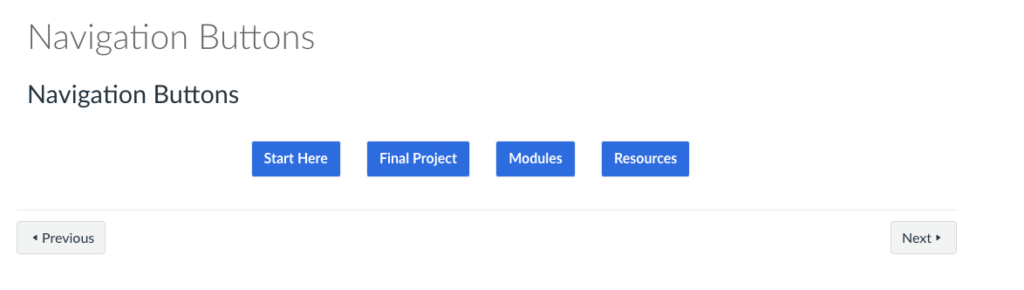
Navigation buttons are easy ways to direct students to specific pages, assignments, or other content within your Canvas Course. These can be especially helpful to put on your Homepage to lead students to where they need to go to start the course, or for certain assignments or resources you want them to have easy access to.
For guidance on how to edit your homepage, see our spotlight, Create a Dynamic Home Page.
- Click the </> button at the bottom right of the RCE in a Canvas Page.
- Copy and paste the HTML Code below into the HTML editor.
- To change the background color, replace the hex code at the top of the code next to “background-color” with the hex code for the new color.
- Click the </> button to switch back to the RCE.
- Click Button 1.
- Select Link Options.
- Enter the Title for the button (where it will direct students to) in the text box under Text.
- To change the color of the font, highlight the text, click the A from the toolbar, and select the new color.
- To change the link to direct students to a specific location in your course:
- Open a new tab in your browser.
- Do not close the tab with the page you’re editing.
- Open your Canvas Account in the new tab.
- Select the Same Course you are editing the page in.
- Locate the item you want the button to direct students to.
- Copy the URL at the top of your browser.
- For New Quizzes, Click Preview from the Build page in the quiz before copying the URL.
- Click the tab with the page you are editing.
- Delete the current link in the Link Options Panel.
- Paste the URL you copied under Link.
- Click Done.
- Open a new tab in your browser.
- RepeatSteps 4-7 for each button.
- To delete a button, highlight the button’s text, and press backspace on you keyboard.
- Click on the space above or below the navigation buttons to add any additional content to the page
- Click Save on the bottom right.
Have questions?
Need additional support on this or other teaching and learning topics? Please visit us fordrop-in support (10am-3pm, M-F) or try one of our self-help tutorials.
Ready to take your teaching to the next level? Opt into our Connections with CTLD newsletter!